Roof installation
There are various types of house roofs. The choice of roof type is made for both practical and aesthetic reasons
Roof
There are various types of house roofs. The choice of roof type is made for both practical and aesthetic reasons When choosing a roof type, it i’s essential to consider factors such as practicality and design. Flat roofs require more maintenance, but with the Shell bau system, their installation is simpler, faster, and these roofs have a more modern appearance.
In the case of pitched roofs, maintenance is less critical, since both water and accumulated debris are more likely to flow into the gutters rather than accumulate on the roof itself.
A. Flat roof
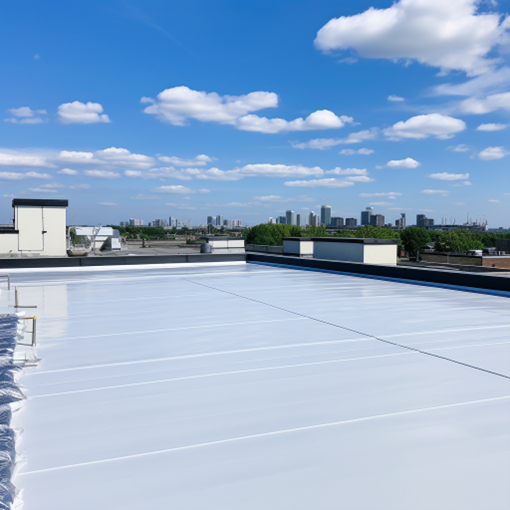
Flat roofs – are those with a slope of 0.7-7 degrees. also known as “matchingbuilt-up roofs” because the final layer and the roofing materials match Modern flat roofs not only serve as waterproofing and thermal insulation but also become serve as an additional useful space. In urban areas, flat roofs are transformed into terraces, gardens, relaxation areas, or children’s playgrounds . Flat roofs can be classified by purpose into usable and non-usable, and by type into traditional and inverted A subtype of inverted roofs is green roofs. When using Shell bau panels, there is no need for additional investments to install a flat roof because the I-2T beams can support heavy loads (the beam spacing is calculated according to the load in each case individually, depending on the roof type, the beam spacing is calculated according to the load).
TheThe inner layer of roll membrane roofing is heated (to around 160-165 degrees) with a special gas burner as specified by the roll roofing manufacturer, usually for a minute or a few minutes, until the bituminous layer liquefies. The most critical areas that require skill and professionalism are roof joints and areas near edges and chimneys.
• In the area of connection of a roof with a vertical surface, the waterproofing layer must rise at least 30 cm, and the ends must be sealed to prevent water ingress.
Green roof
Green roofs are a popular modification of inverted roofs. Green roofs are popular in places like Pamir, where fertile soil is spread on roofs to grow vegetables, and in Norway, where green roofs serve as excellent thermal insulation.

The requirements for these roofs
The requirements for these roofs differ from conventional inverted roofs because, first and foremost, the ability of plants to penetrate the smallest cracks and expand, must be considered. To protect against root damage, a PVC or a foil layer is laid.
The drainage layer should be at least 100 mm thick, and it is suitable to use expanded clay or gravel with a particle size of 5-20 mm. A synthetic fiber, rock wool felt, and a layer of glass fabric are used for the filtering layer.
The thickness of the soil substrate depends on what you plan to plant on the roof. Lawns and flower beds require 10-20 cm, flowers and flowering shrubs need 20-30 cm, and shrubs and small trees require 40-70 cm of soil.
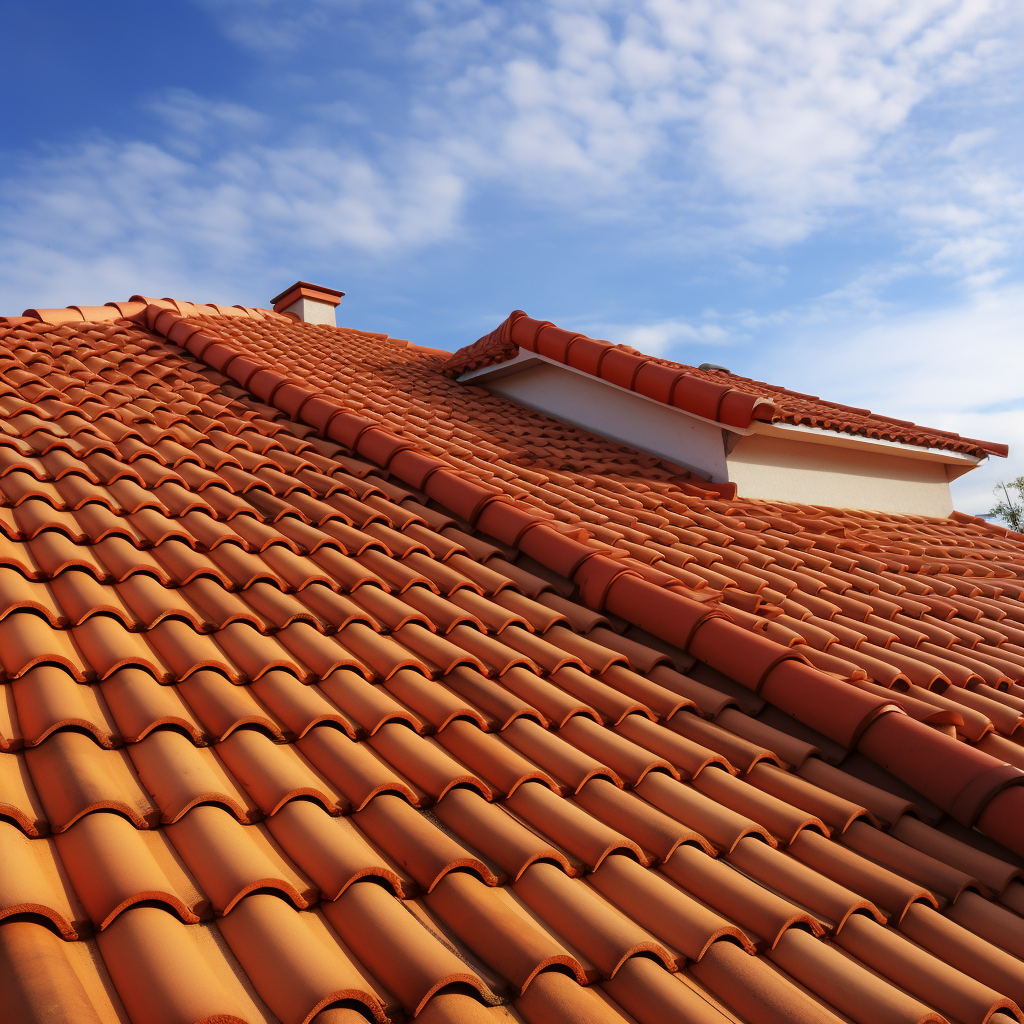
B. Pitched roof
- Wooden beam
- Cement board
- I-beam, thermally insulated
Pitched roofs are not popular for Shellbau type houses because their more complex structure leads to longer installation times and increased costs compared to flat roofs. The following materials can be used for finishing pitched roofs
- Sheet metal;
- Ceramic tiles;
- Concrete tiles;
- Slate roof tiles;
- Asbestos-free corrugated board;
- Bituminous shingles.
Installation
On Shellbau panels, at the connecting details, diffusion membrane is mounted which is pressed down with longitudinal purlins ("noodles"). These longitudinal purlins allow air to flow between the roof covering and the Shellbau panels. Such roof ventilation is essential, especially when using a steel roof covering, which condenses faster than asbestos-free slate tiles, or other pitched roof coverings. When installing a roofing without longitudinal purlins, the resulting condensation will flow down the slope to the nearest purlin (horizontal), causing these purlins to deteriorate much faster
On the longitudinal beams, purlins are installed. Roof purlin installation is one of the most critical stages in roof construction and must be done precisely. The spacing of rafters depends on the type of roof covering: for one type of roof covering, a spacing of 40-50 cm is suitable, while for another, it may be necessary to install purlins almost tightly packed. Therefore, be sure to consider the manufacturer's recommendations for the installation of the chosen roof covering
On the front board and the folded sheet of the roof, the first part of the rainwater drainage system is installed – the gutter brackets. When installing a PVC (plastic) rainwater drainage system, the gutter brackets should be fastened at a distance of 40 to 60 cm, while for the installation of steel rainwater drainage systems, it is recommended to mount the brackets no more than 80-90 cm apart. The essence is simple: the closer the gutter brackets are fastened together, the more securely the rainwater drainage system will hold.
In the next step, the gutter is installed. This crucial component of the rainwater drainage system must be installed in such a way that there is approximately a 20-30 mm distance between the outer edge of the gutter and the 'imaginary' line extending from the end of the roof plane at one corner of the roof, as shown in the figure. In the other corner of the roof structure, the distance should be smaller, to create a slope in the gutter and allow water to drain in the correct direction. If the gutter is mounted above the "imaginary" line, there is an increased risk that during winter, the gutter will be subjected to a heavier load from melting snow, making the rainwater drainage system more vulnerable.
Next, a drip edge (apron board) is installed on the first purlin so that it does not attach to the gutter. In this way, an air gap and optimal roof ventilation are ensured.
Finally, the roof covering, roof underdeck cladding, and other roof accessories are installed.